
How to Connect Epson SureColor P700 Printer via Bluetooth?
February 12, 2025

Do you want to learn 'how to connect your Epson SureColor P700 printer to your computer using Bluetooth'? If you are not sure how to do it, you’ve come to the right place! This guide will explain simple steps to connect your printer to a Mac and a Windows computer.

First, we’ll get your printer ready for the connection so everything goes smoothly. Once you are set up, you can easily print important documents for work or fun school projects for your kids.
Just follow the easy instructions in this guide, and you’ll be printing in no time. Whether that’s completing assignments or printing out your favorite pictures, the guide has made everything simpler for you. Get ready to start your exciting printing journey now.
Get Ready With Your Epson Printer
Before connecting your printer to your computer, you need to prepare it for better use. Below, you will find the key steps to prepare your Epson SureColor P700 printer before connecting it to Bluetooth:
- Unpack and remove the packing: Take the printer out of its box and remove all the protective tape.
- Load paper into paper tray: Open the paper tray and feed the paper according to the paper size guidelines.
- Install ink cartridges: If necessary, open the ink cartridge compartment and install fresh cartridges.
- Connect power: Insert the power cable into your printer and wall outlet.
- Turn on the printer: Press the power button and turn it on.
- Check Wi-Fi settings: Access the printer’s settings menu and make sure the Wi-Fi network is selected. Ensure that the password you have entered for the wireless network is correct.
Connect Epson Printer to Windows via Bluetooth
Below are some of the easy steps to connect your Windows computer to your Epson SureColor P700 printer using Bluetooth. Follow the steps carefully and make sure you connect your PC properly without making any errors.
- First, you need to print a Self Test Page to receive the passkey, e.g., “0000”.
- After that, make sure your printer is turned on to print a test page.
- Once your printer is powered off, press and hold the FEED button.
- Then, turn on the printer.
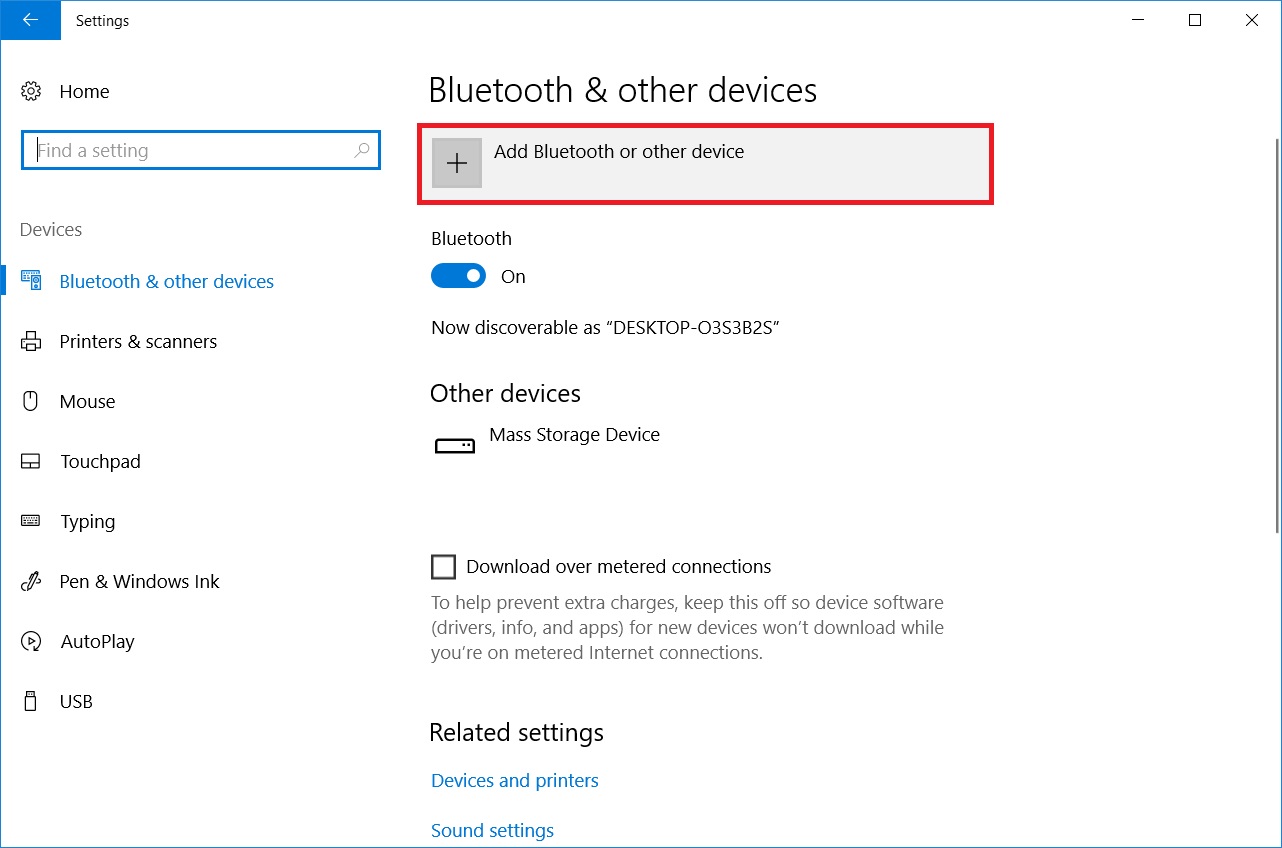
- Navigate to your PC and open the Bluetooth Settings.
- On the Bluetooth Settings window, look for the Add Bluetooth or other device option and click on it.
- Next, hit the Bluetooth option and wait for the search to find available devices.
- When prompted, type the passkey–0000 to connect the printer to the computer.
- Then, your printer will be paired with Bluetooth.
- You are ready to install the printer drivers on your PC.
- Finally, when the driver is installed, you can begin printing the test page.
Connect Epson Printer to Mac via Bluetooth
If you are a Mac user, you can connect your printer using Bluetooth by following the simple methods mentioned below:
- First, make sure to update your Mac software.
- Then, select the Apple menu > System Preferences.

- Next, click on the Software Update option.
- If a new version is available, go ahead and install it.
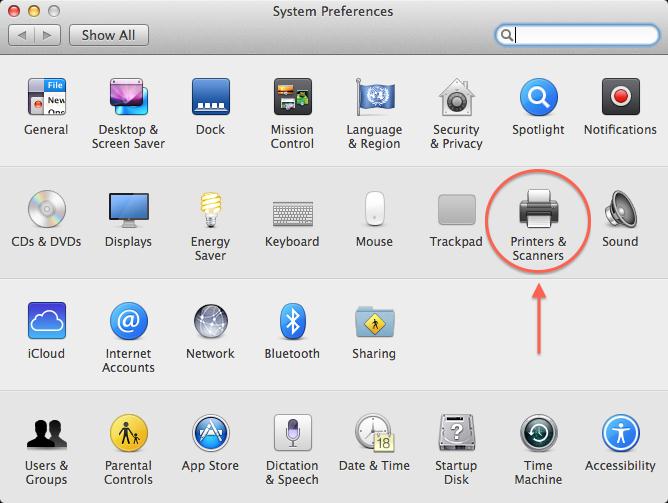
- After that, open the Apple menu again and select System Preferences.
- Click on Printers and Scanners.
- Now, press the Add button.
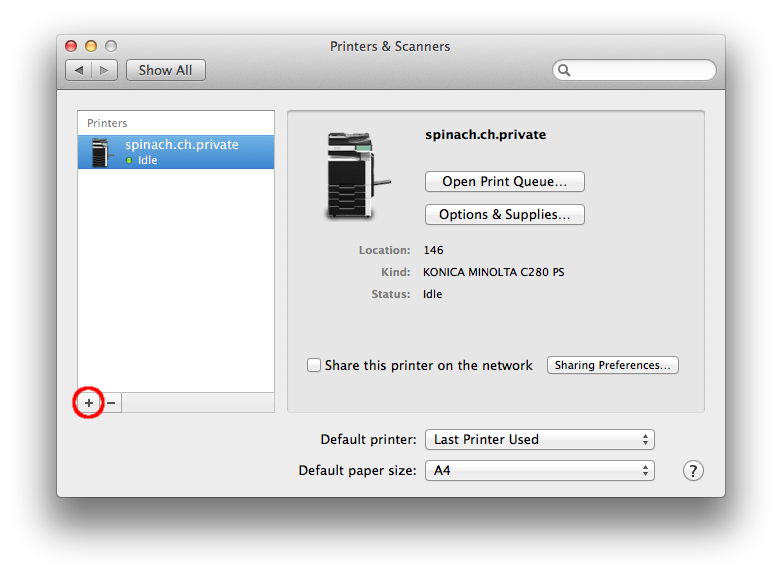
- When you see your printer in the list, click on it.
- Finally, click on the Add button to finish.
Now that you have learned 'How to connect your Epson SureColor P700 printer to your Windows PC and MacBook', you might want to learn how to print your photos and documents. Whether you are using Windows or a Mac, knowing how to connect your printer is important so you can print your documents easily.
Final Words
In this blog, we have explained 'how to connect your Epson printer to different devices, such as Windows PC and Mac'. This simple guide starts with getting ready with the printer and then connecting it to the computer. Everything has been explained in a simple way so you can understand the guide without having any prior technical knowledge about your printer. Start your printing journey without any hassle!
Frequently Asked Questions
Question
How to Connect Epson Printer to Wi-Fi?
To connect the printer to Wi-Fi, follow these steps:
- Turn on
the printer.
- Then,
press the Home button on the
control panel.
- Select
the Wi-Fi Setup option.
- Choose
the Wi-Fi Setup Wizard.
- Select
your wireless network from the list.
- Type in
your Wi-Fi password using the control panel.
- Confirm
the Wi-Fi network settings and wait for the connection to complete.
- Check the
printer’s LCD screen for confirmation. If you need it, you can refer to
the printer’s manual for specific instructions related to your model.
Question
How to Connect Epson Printer to iOS Using Bluetooth?
To connect the printer to an iOS device using Bluetooth, follow these steps:
- Turn on
the printer and activate Bluetooth. Check out the printer’s manual for
info.
- On your
iOS device, open "Settings."
- Tap
"Bluetooth" and
ensure Bluetooth is turned on.
- Wait for
the printer to appear in the list of available devices.
- Select
the printer to pair. You may need to enter a PIN if prompted.
- After
pairing, open the app from which you want to print.
- Select
"Print" and choose
your printer model.
- Adjust
print settings and tap "Print."
Question
Why Does My Epson Bluetooth Printer Not Connect to PC?
If your Epson printer isn’t working, there could be several reasons as follows:
- First,
make sure it’s plugged into a power source.
- Check the
USB cable or the Bluetooth signal, as either might be faulty.
- Also,
make sure Bluetooth is turned on if your printer uses it.
- If you
are using Bluetooth, the signal might be weak, making it hard for the
printer to connect.
Enter your Comments Here: